WakeMeGo guides

How-to Timeline

Step-by-step guides to help you stay safe and make every journey worry-free.

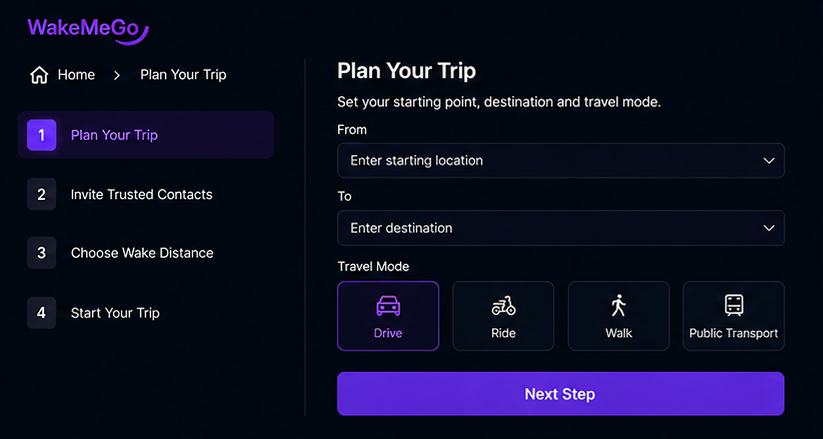
WakeMeGo Plan Your Trip screen
1
Step 1

Plan Your Trip

Learn how to set your starting point, destination and travel mode.

Choose your route details carefully so WakeMeGo can track your trip and provide the right alerts.
Step 2

Invite Trusted Contacts

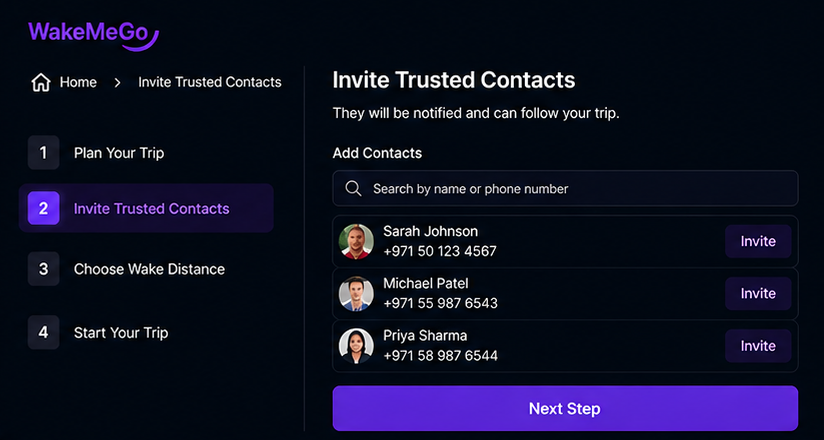
Add trusted people who will be notified and can follow your trip.

Your selected contacts can stay informed about your journey and receive important updates.

2
WakeMeGo Invite Trusted Contacts screen
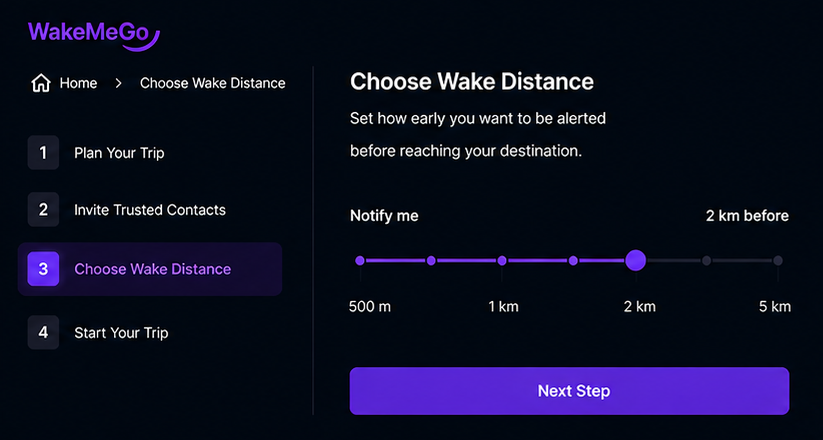
WakeMeGo Choose Wake Distance screen
3
Step 3

Choose Wake Distance

Set how early you want to be alerted before reaching your destination.

Choose a distance that gives you enough time to prepare before you arrive.

Step 4

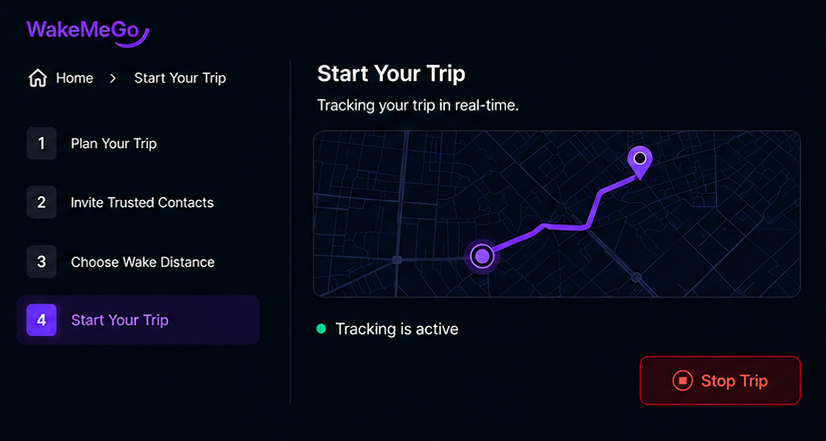
Start Your Trip

Start tracking your journey and keep your loved ones informed in real-time.

Once your trip is active, WakeMeGo will continue monitoring the journey and send the appropriate alerts.

4
WakeMeGo Start Your Trip screen
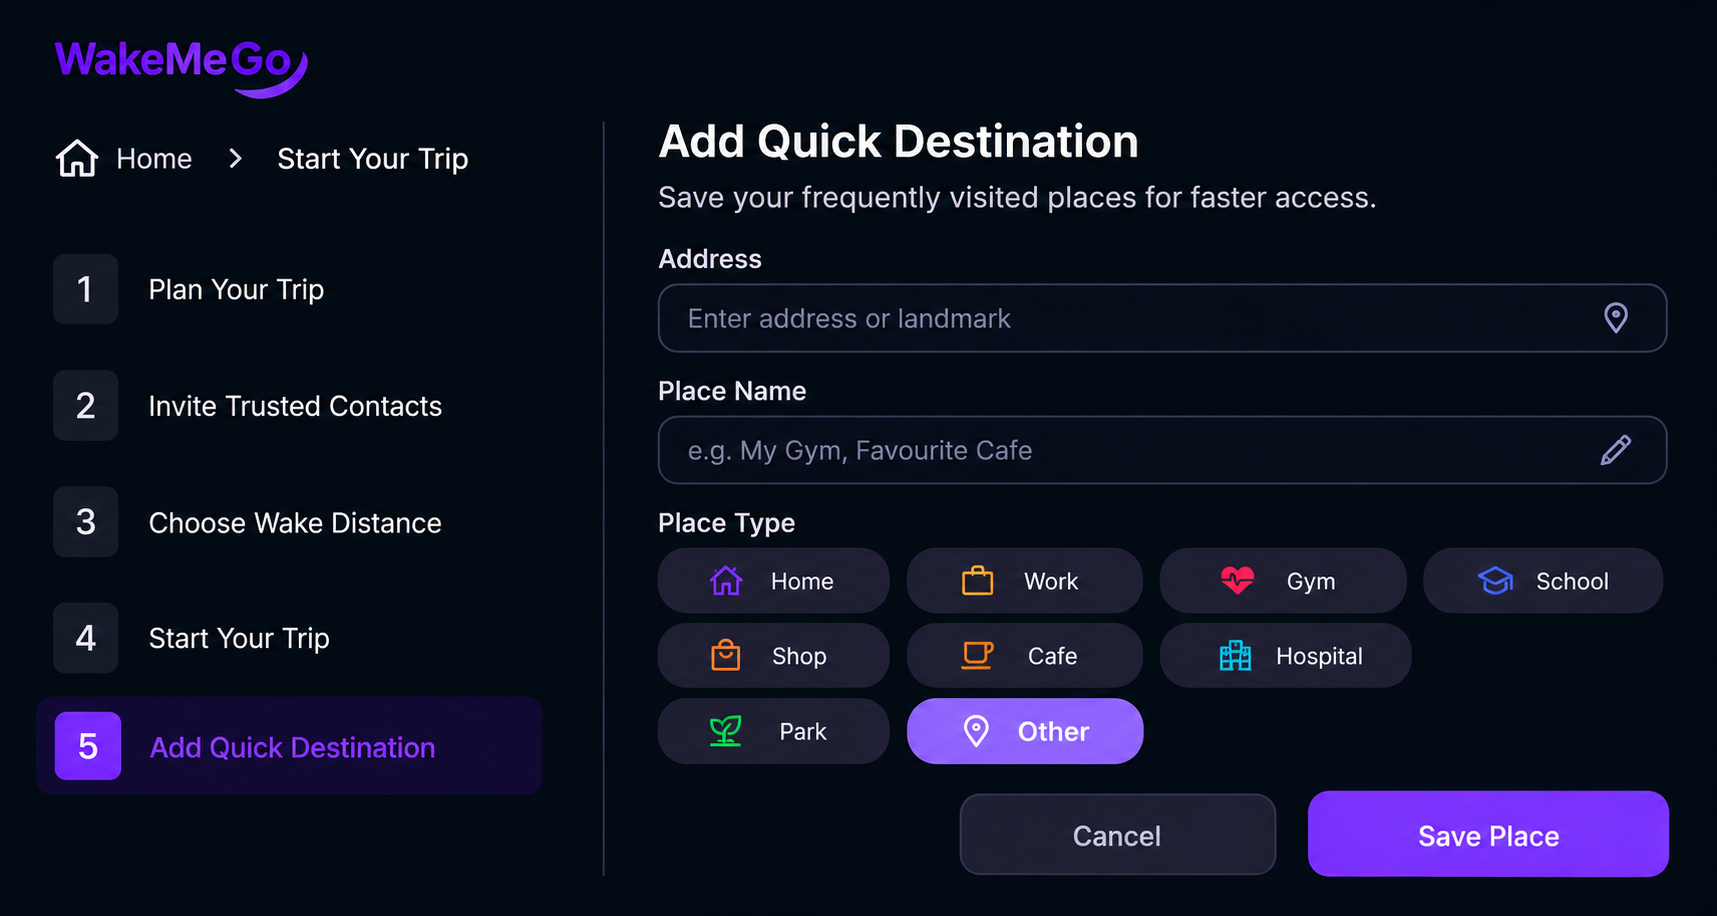
WakeMeGo Add Quick Destination screen
5
Step 5

Add Quick Destination

Save places you visit often so you can access them quickly when planning a trip.

Add an address, place name and destination type, then save it for faster access later.

Step 6

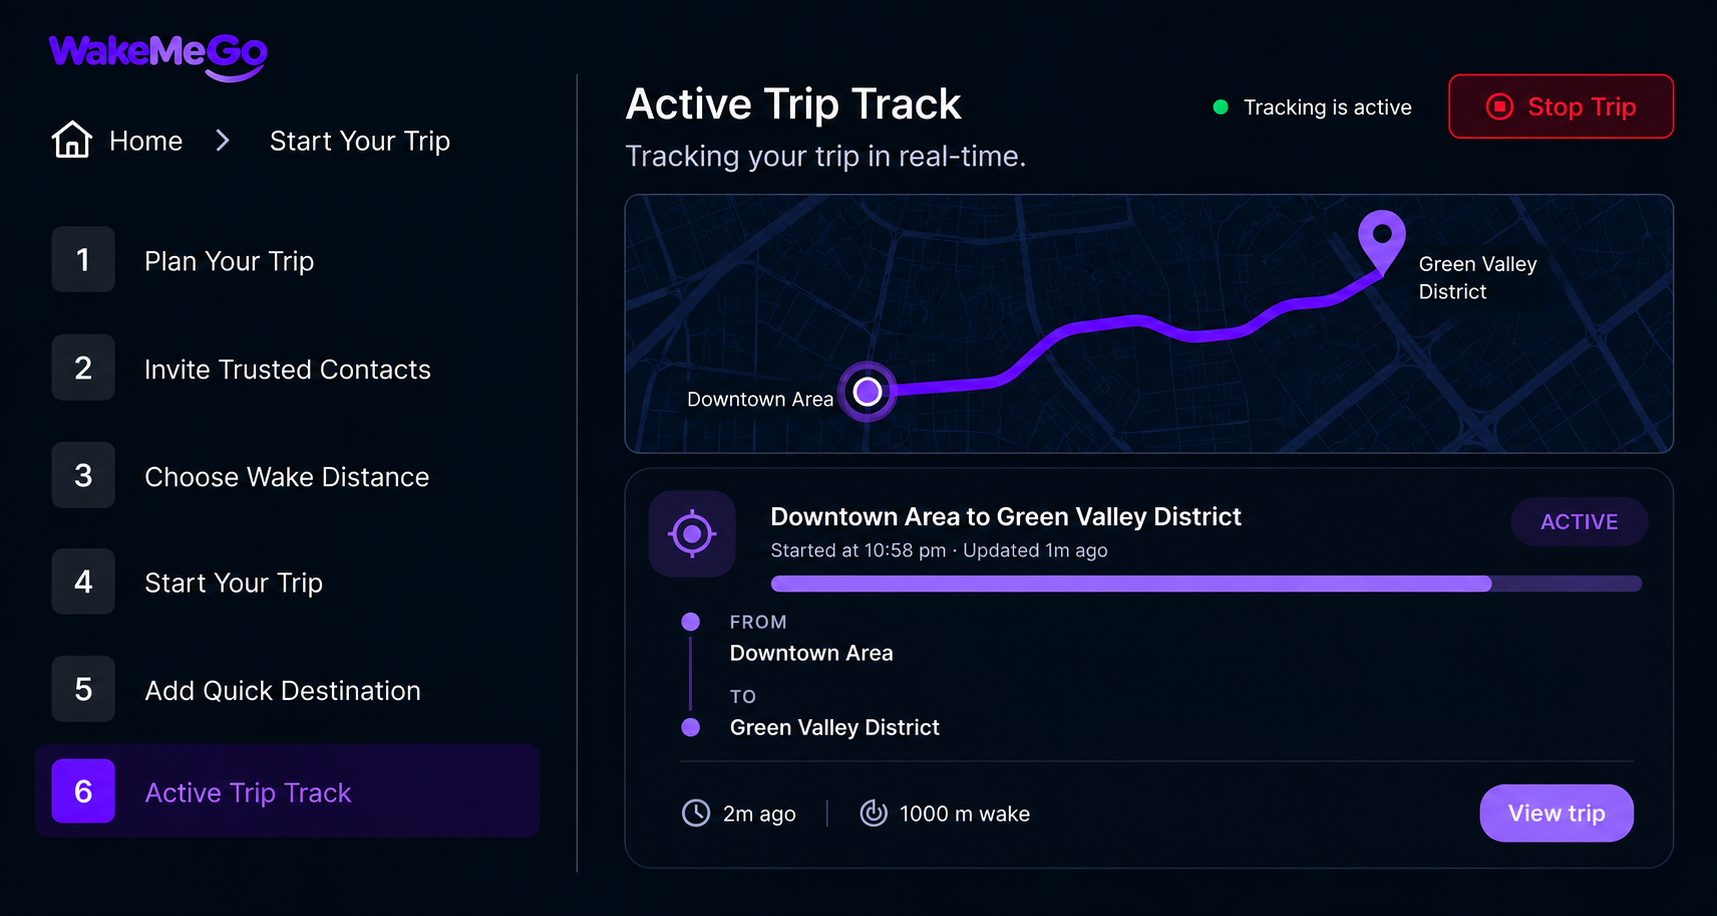
Active Trip Track

Track your active journey in real-time and keep an eye on your current trip status.

View your route, trip progress, wake distance and important trip information from one screen.

6
WakeMeGo Active Trip Track screen
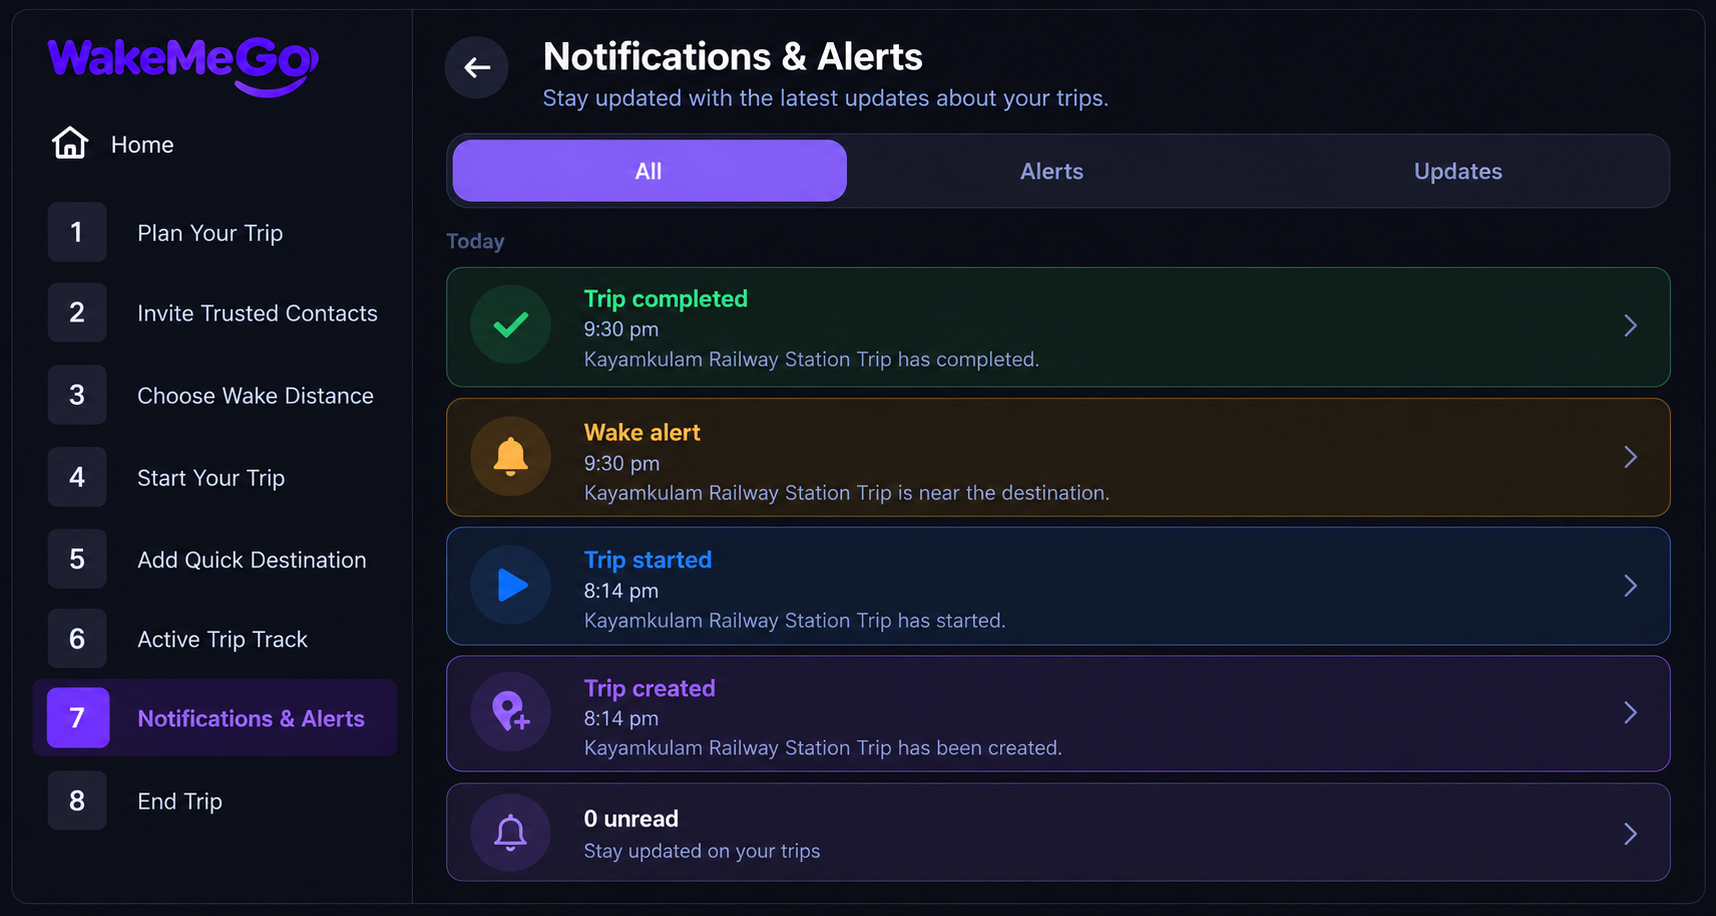
WakeMeGo Notifications and Alerts screen
7
Step 7

Notifications & Alerts

Stay updated with important information about your trips and safety alerts.

Review trip activity, wake alerts, updates and other notifications from one place.

Step 8

End Trip

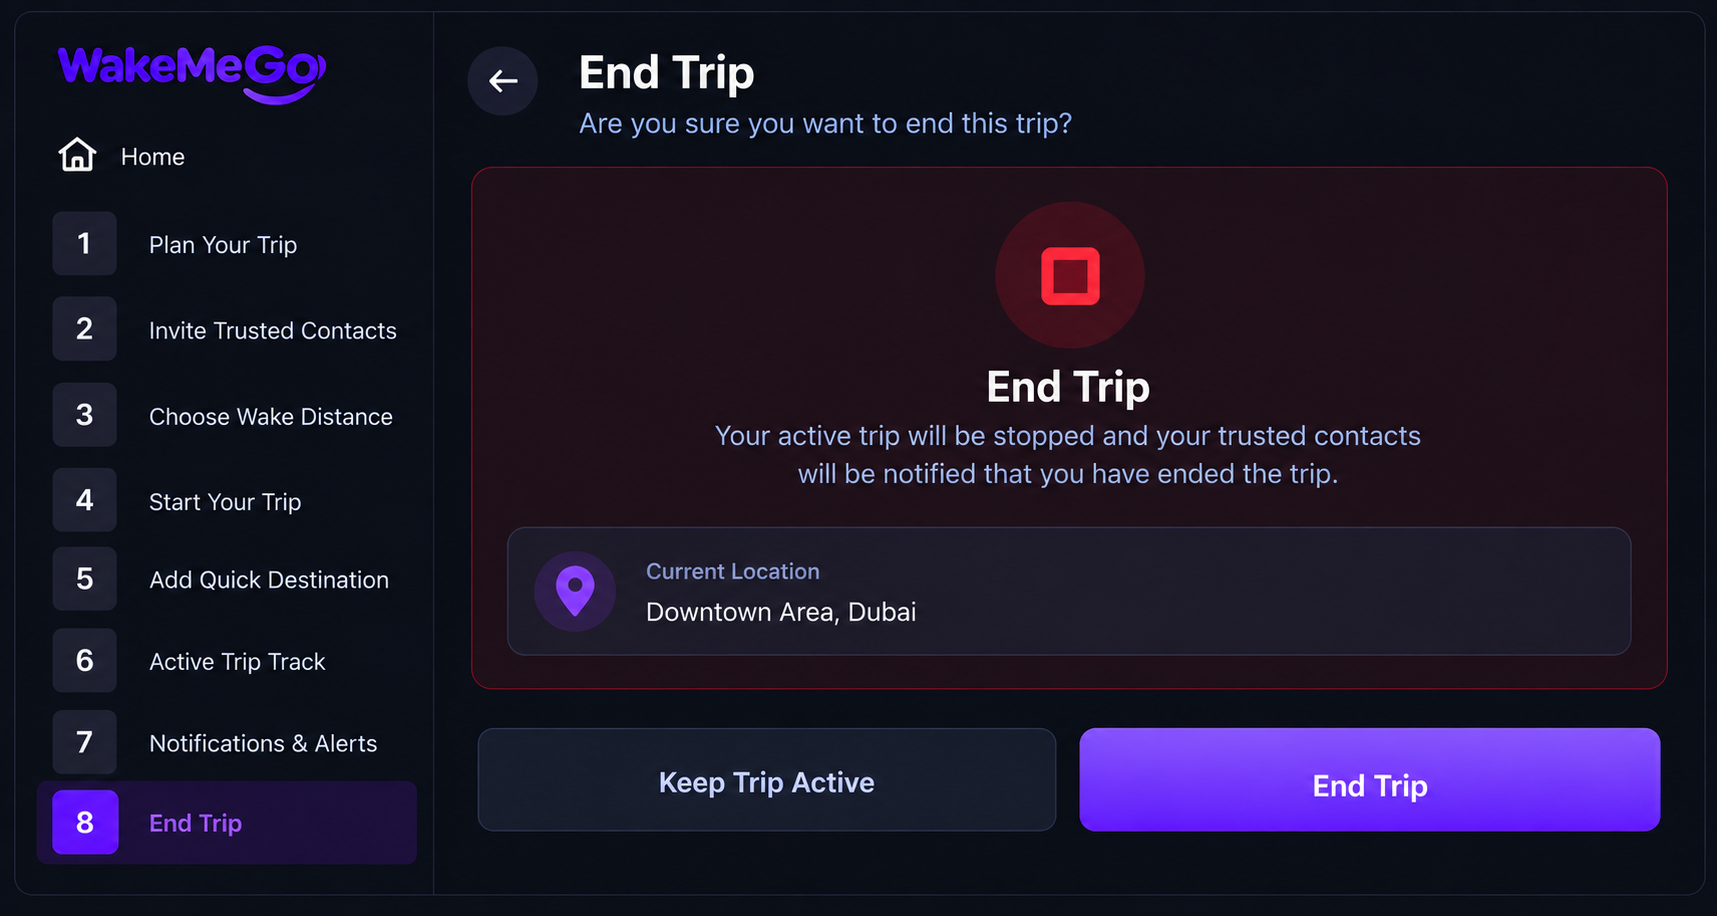
Safely end your active trip when you reach your destination or no longer need tracking.

WakeMeGo confirms that the trip has ended and your trusted contacts are notified.

8
WakeMeGo End Trip screen

Need more help?

Explore more guides or visit our FAQ section.